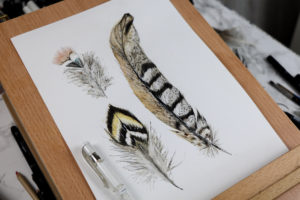
Do you know that you can use uni-PIN fineliners over watercolour? In this handy step by step, artist and illustrator Ella Johnston talks you though how to create a stunning feather-themed art piece using watercolour paints and uni-Pin fine line pigment ink markers. This illustration project really makes the most of the PIN’s variation in nib size, allowing you to create beautiful lines and details.

Step 1
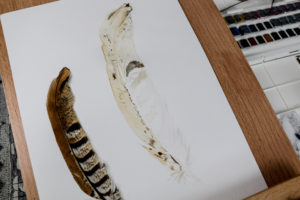
Draw a very simple outline of your feather in a light, hard pencil as a guide. To create a solid sketch, centre your subject by drawing the rachis (the central line of the feather) first then the bottom hollow shaft. This will provide a good anchor to structure your sketch. Working out from your anchor point, give your feather a simple shape by drawing the outline of the vane.
Step 2
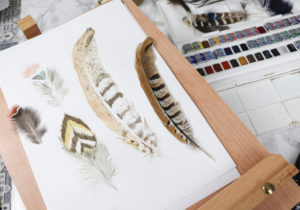
Apply a first wash of very light watercolour in your chosen colours, remember it’s best to build up layers of watercolour rather that be heavy handed with thick paint.
Step 3
Keep building your watercolour wash layers. Use smaller brush sizes to add fine details such as specks of colour, feather edges and wispy downy areas. Leave to dry.

Step 4
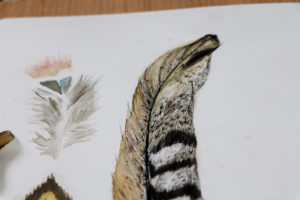
Once happy with the watercolour you can start using your uni-PIN pigment ink fine line pens. Use the smaller nibs to make fine lines and cover darker areas by building strokes of the medium nibs.
Step 5
Finish your black pigment pen detailing by filling in the darkest areas and details (such as the rachis) by stippling with the largest pigment pen nibs.
Step 6
You can add a further flourish by adding highlights with a white pigment ink pen.
You can see Ella create another feather drawing using the grey uni-PIN by following the drawing video tutorial here..