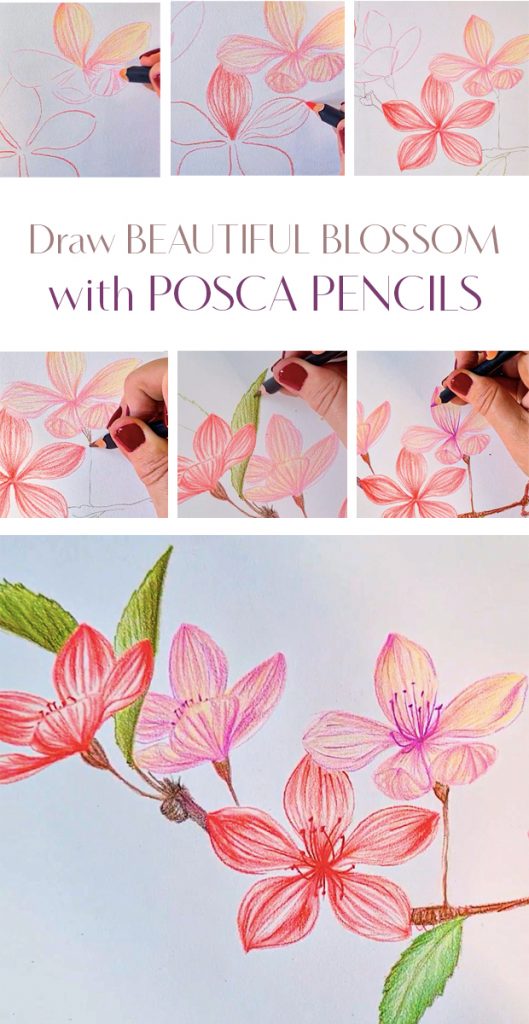
Achieving beautiful pencil illustrations is easier than you think. To prove it we’ll show you how to draw delicate blossom with POSCA PENCILS in this simple step by step blog. Blossoms are an easy to subject for a beginner to master, we promise!
POSCA PENCILS – a great choice
POSCA PENCILs give you the chance to explore an almost infinite array of drawing styles and artistic approaches. While POSCA PENCILs give you a fabulous, crisp, clean line you can also employ various blending methods to build areas of both solid and mixed colour. This will help you create remarkable artworks with plenty of depth, richness and intensity.
You can work with various shading techniques to build colour. Work layers of your shade over and over for a more intense hue and simply use one to two layers of colour for a lighter tone. Blend further by working colours over each other to achieve beautiful, complex tonality. When using this method keep your pressure and strokes even and in the same direction. You can also cross-hatch with other colours to make more interesting shading.
You can explore all of the above in this blossom project.
Top tip! Remember to keep your POSCA PENCILS sharp; a precision point will help you get the detail and texture you require.
Beautiful blossom artworks, you will need
To create our floral illustration we used the following…
- A sketch book
- POSCA PENCILS : ivory, green tea, mavue, dark brown, light pink and lilac OR white, coral pink, vermilion and brown – or both sets of colours as we’re doing here.
Draw delicate blossom with POSCA PENCILS, step 1
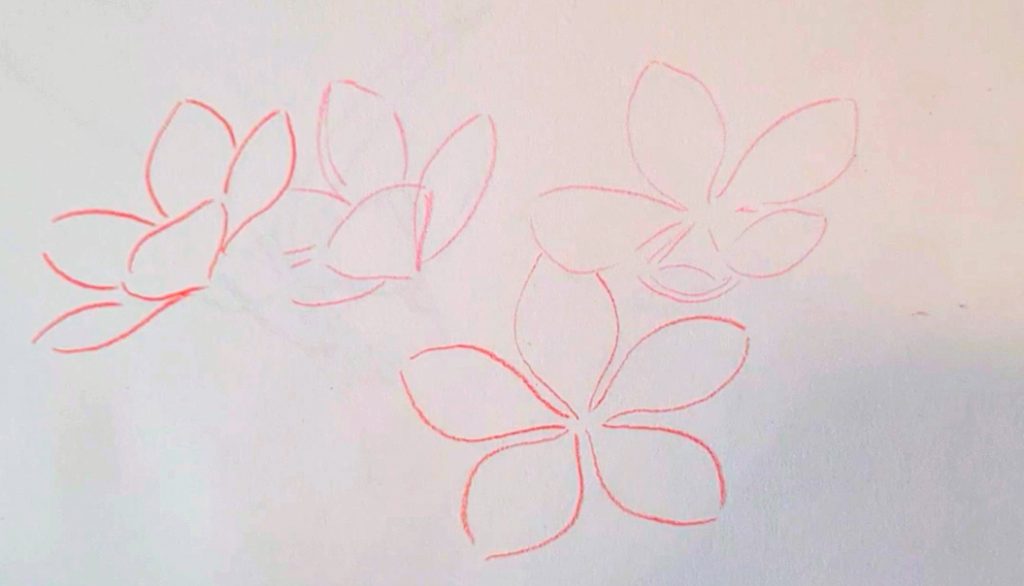
To start to draw delicate blossom with POSCA PENCILS make your basic flower shapes. Blossom flowers have five petals. So for an open flower, draw one petal on the top as a guide, then two at the bottom to make a kind of triangular shape, this will give you a space either side for the petals at the side for your basic flower shape. You can then create variations on this as you go on.
In terms of making your simple petal shapes – thing of them as open-ended leaves or as two curved vertical lines meeting at the top.
Colourful POSCA PENCIL flower drawings, step 2
Now it’s time to layer your colours…
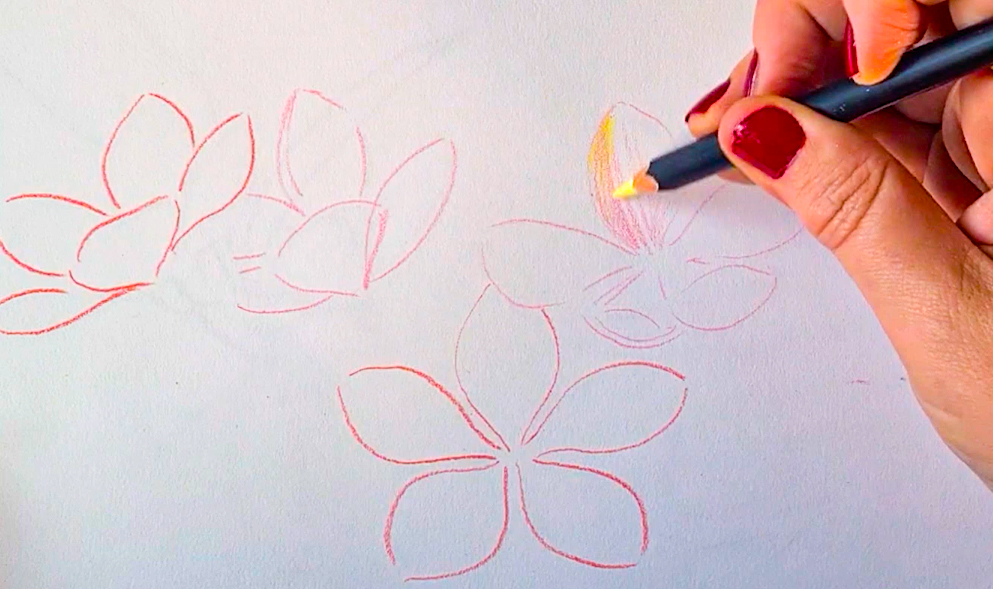
Using downward strokes, layer your pink shades with your white or ivory POSCA PENCIL. You want to use a light pressure and build the colour rather than start heavy – remember these blooms are delicate and fragile so we need to show this in our work!. The vertical strokes emphasis the shape of each petal.
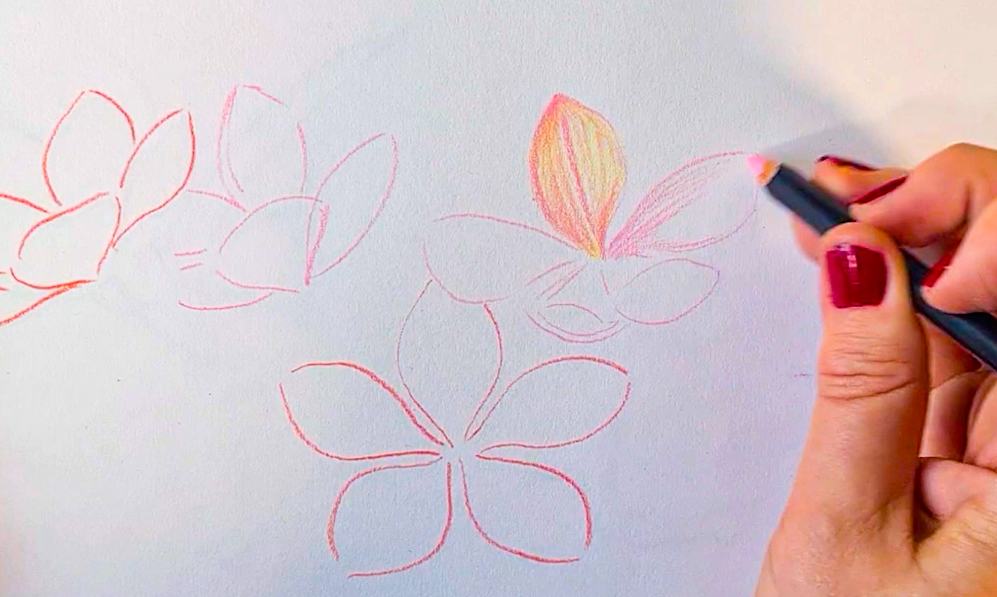
Once you are happy with your colour coverage you can apply a slightly heavier pressure on the page to pick out the shape and detail.
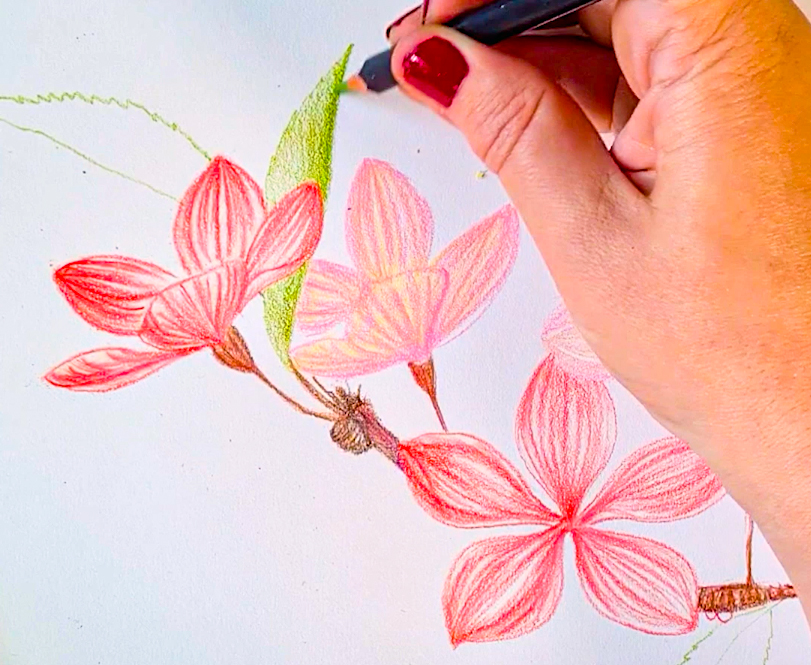
Draw delicate blossom with POSCA PENCILS, step 3
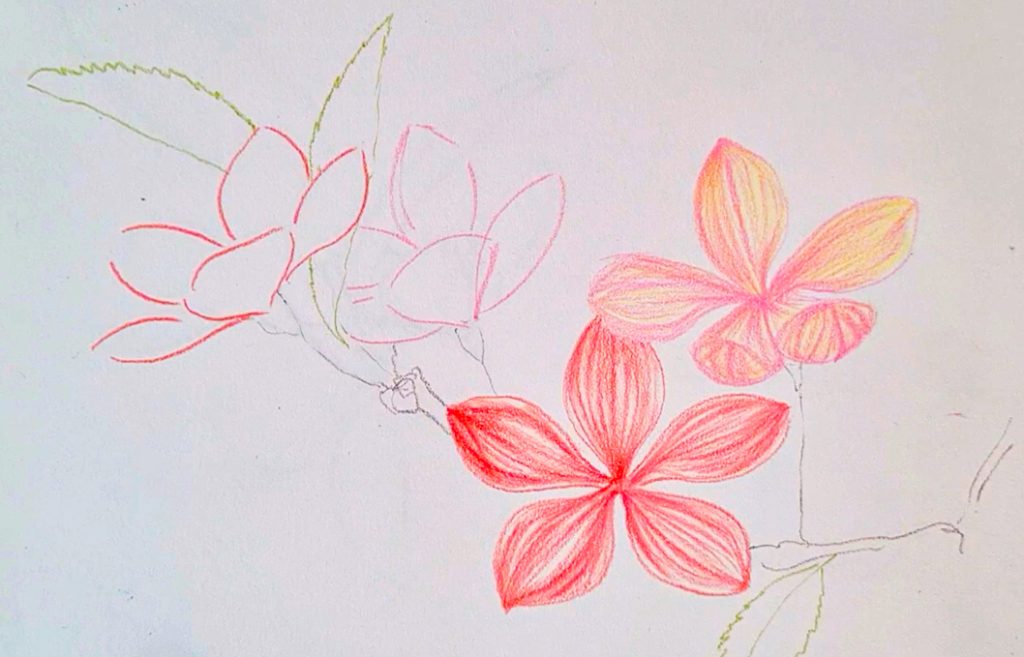
While you’ve ‘filled in’ your main flowers, draw in some structure such as leaves and branches. We’ve kept this piece quite minimal. So we’ve drawn in a frail branch and three leaves. As you see here we want the composition to be natural and balanced. So we have two leaves at the top reaching to the top left corner of the page, and a third leaf pointing down to the bottom right.
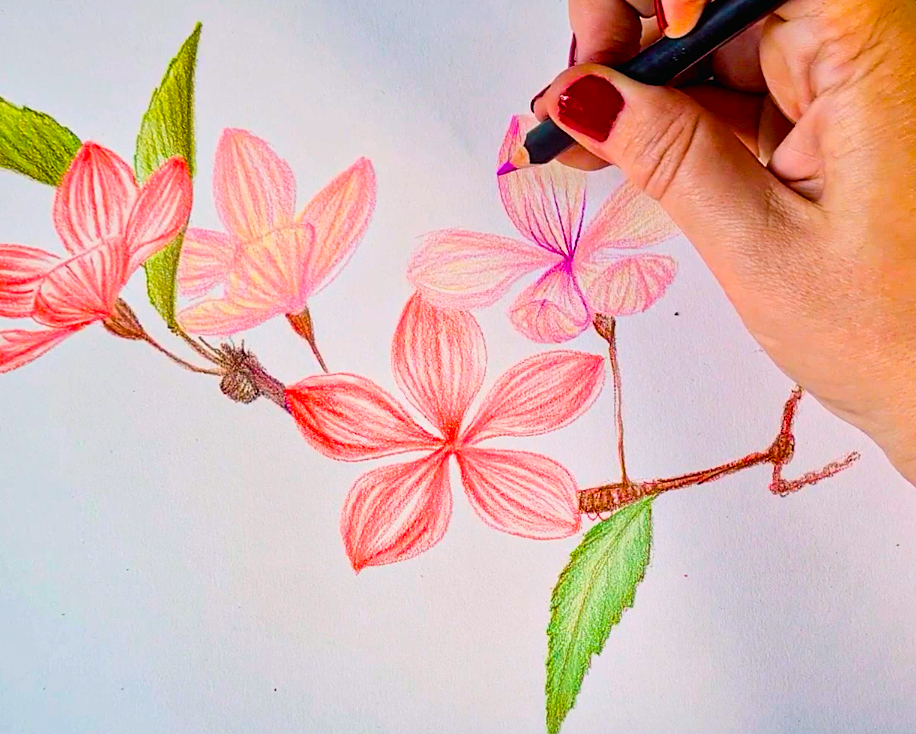
Pretty flower drawing with POSCA PENCILS, step 4
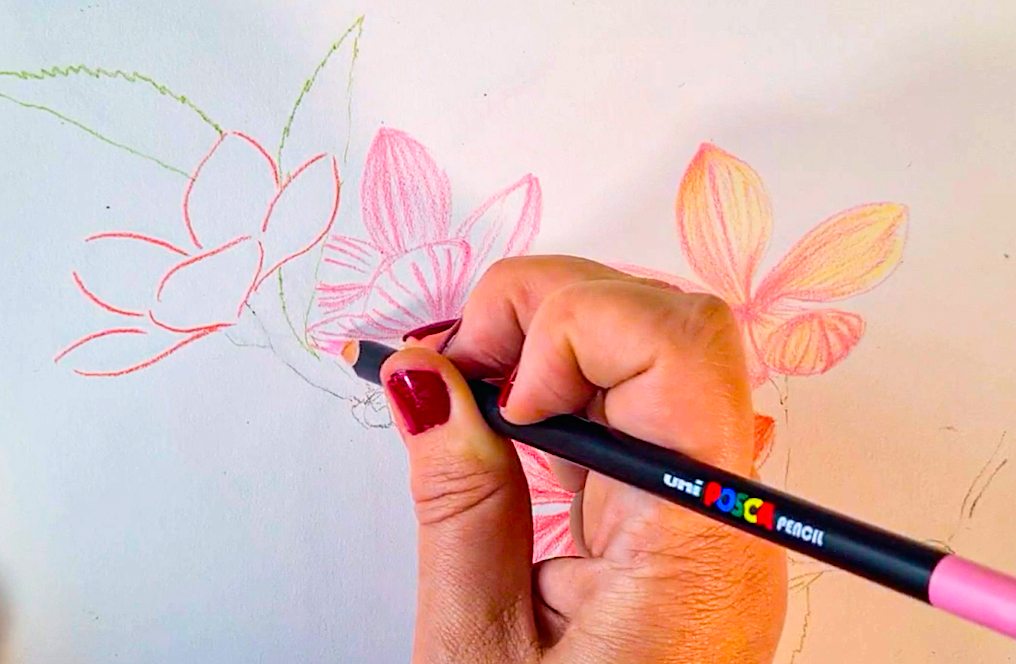
Now you’ve got your structure you can complete your blossom flowers. For the branches and the leaves, layering is also key.
For the branches we have blended mauve and crimson colours with our brown shades to give the woody areas more depth.
Again we’ve started light and built the colour intensity over and over, leaving some sections with a very light touch and cross hatching to others to give the branches more shape and interest. We’ve applied the same principle with the leaves, applying brown and white/ivory shades as well as the green pencils.
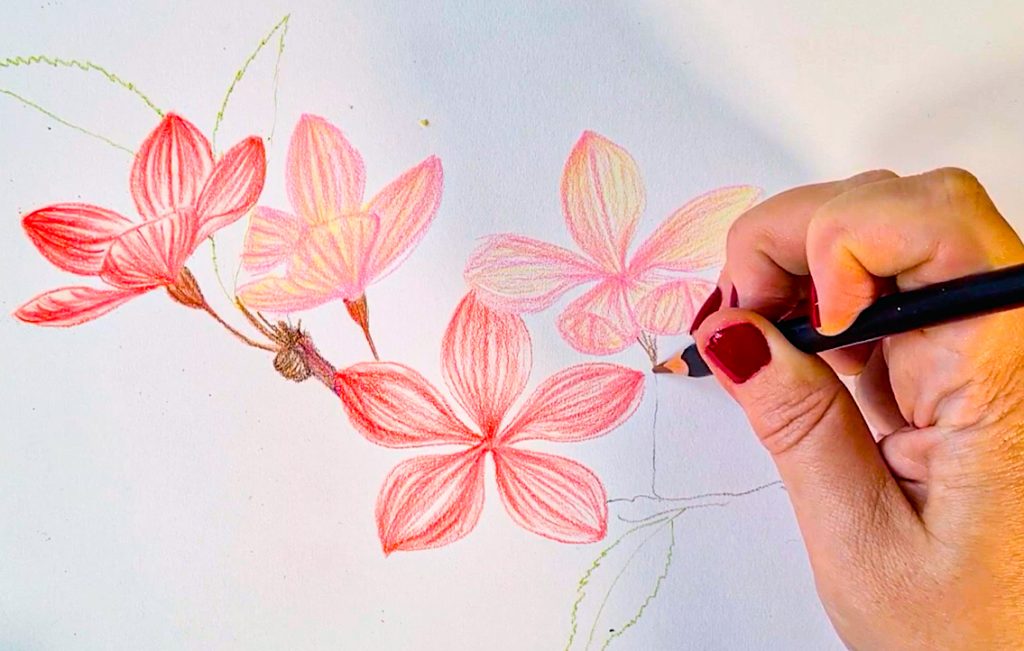
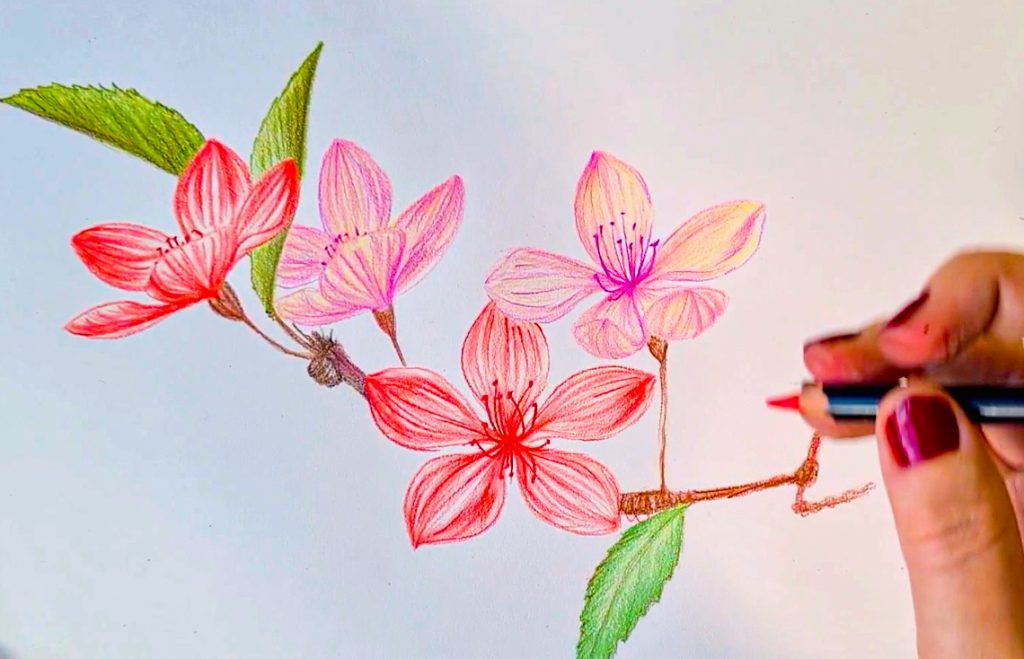
Draw delicate blossom with POSCA PENCILS, step 5
Now you will need your POSCA PENCILS to be super, super sharp as we apply our detail over the coloured piece. It is essential that you keep your pencils really on point for this as you’ll get a much more precise, crisp line if you do.
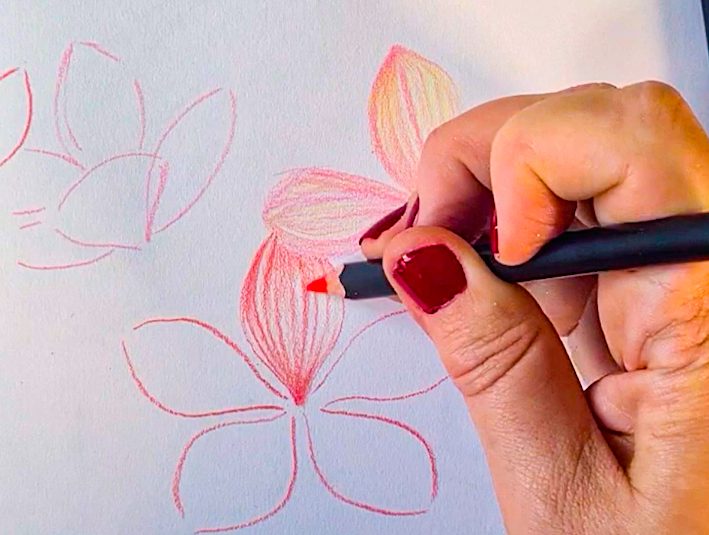
First use the darker of your pink shades to pick out detail and add definition to your petal shapes. Then you can draw in your flower centre, you can apply a heavy pressure on the page when doing this so that the centre will really ‘pop’.
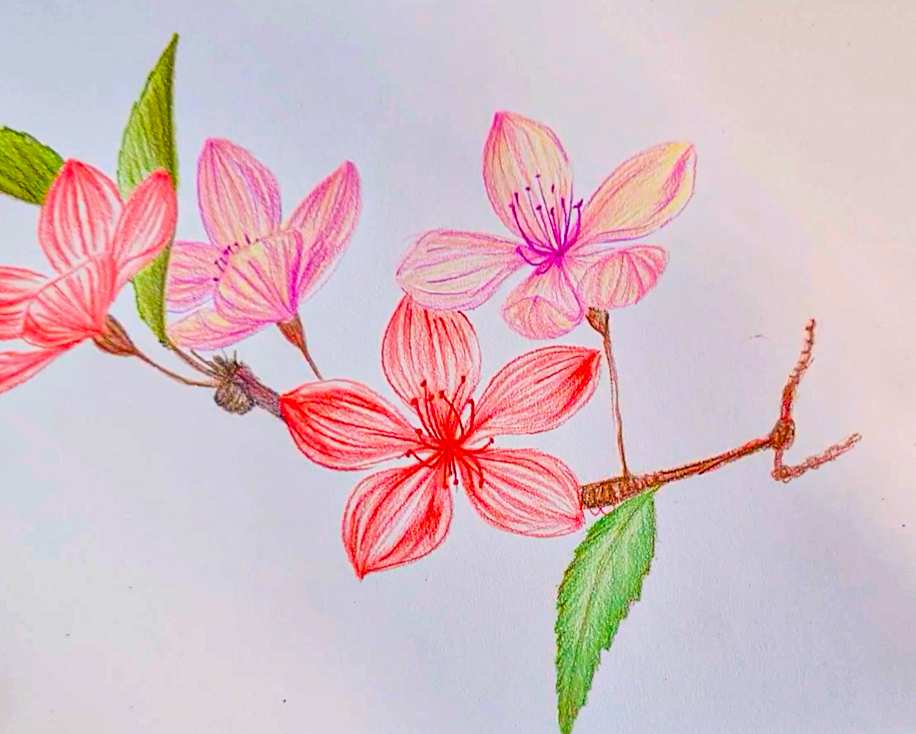
Now you can apply strong, but delicate, lines and definitions with over your leaves and branches – remember shape is everything so make sure your lines are following the shape of your objects.
If you enjoyed drawing delicate blossom with POSCA PENCILS, check out our POSCA PENCIL drawing tutorial on a beautiful blue bird or have a look at our POSCA PENCIL videos on our YOUTUBE channel.